|
Using the link below (which provides an excellent high-resolution image of a standard Monopoly game board), redesign the game board so that it becomes an ORIGINAL (meaning do not copy another design) "THEMED" Monopoly game. The theme of your new game could be just about anything... sports, cartoons, music, video games, movies, etc. Make it something that's interesting to you. Make sure that you change all of the spaces in some way. Change the colors and names. Do not copy directly from the example below. Make it your own... make it creative or funny or ironic... make it unique. Whatever colors you choose, make sure to change all the colors from the traditional original colors of Monopoly to new ones. Use Pixlr and Inkscape to do your work. Do all of your photo editing and coloring in Pixlr and IT IS A REQUIREMENT OF THIS ASSIGNMENT THAT YOU USE INKSCAPE FOR ALL OF YOUR LETTERING/TEXT. Oh, and have fun with the assignment :-) High-Resolution Monopoly Game Board: https://img00.deviantart.net/b361/i/2010/227/4/e/blank_monopoly_board_by_mrshineybaldy.jpg Here Are some examples of different Monopoly themes: 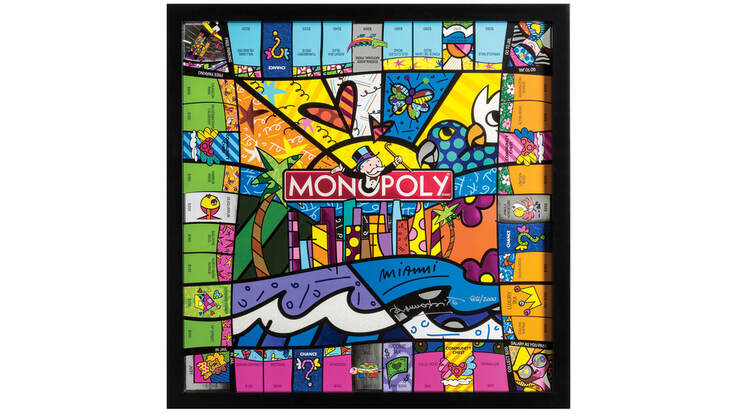 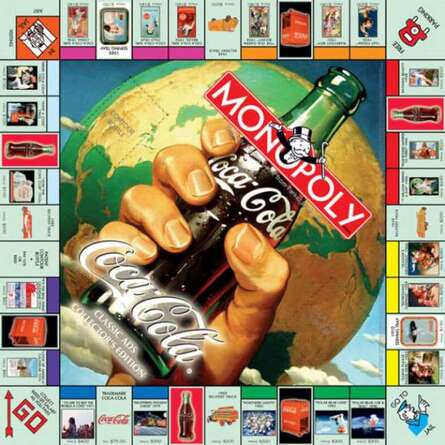 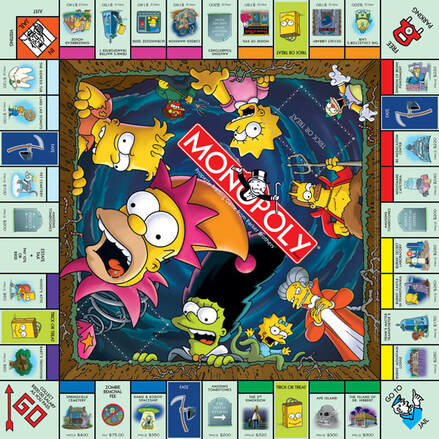 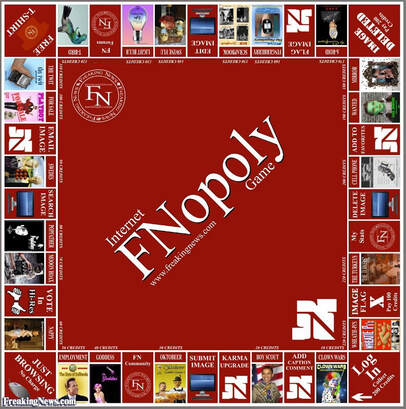  ASSIGNMENT:
Find an image online of a blank US map. I strongly recommend an image that is larger than 1000 pixels on all sides. Open it in Pixlr. (I found two maps that you might consider using. You can use the following links if you want to check them out: https://www.bing.com/images/search?view=detailV2&id=8F504FB8C472907A286DFD1398ACBAF2DF2D7919&thid=OIP.ALI9ix5-UakUVCBSHTW1ygHaEz&mediaurl=http%3A%2F%2Fupload.wikimedia.org%2Fwikipedia%2Fcommons%2F9%2F9d%2FBlank_map_of_the_United_States.PNG&exph=983&expw=1513&q=blank+map+of+the+u+s&selectedindex=3&ajaxhist=0&vt=0&eim=1,2,6 Blank_US_Map.svg_.png Choose PHOTOS (actual photos of REAL things, NOT drawings, designs or logos) that, in YOUR opinion represent each state... images that symbolizes each state. You may have to do a little online research for information about states you are unfamiliar with. Fill in your blank map with the images you've chosen for each state, trimming them to fit neatly in the spaces. This will be your final evaluation of your skills at photo editing and compositing. Do good work :) PS... Sorry I didn't finish my example below. There is a good reason for it. FORMATTING FLASH DRIVES 1. First, name the flash drive using your last name followed by your period number. See example below. Do this by right-clicking on your flash drive and scrolling down to RENAME 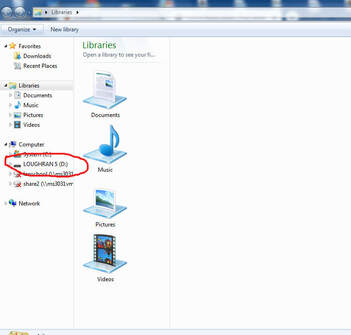 NEXT, create a folder named DIGITAL ART PROJECTS. Do this by right-clicking out in the open space when your flash drive opens up with the content of your flash drive and then clicking NEW and then FOLDER 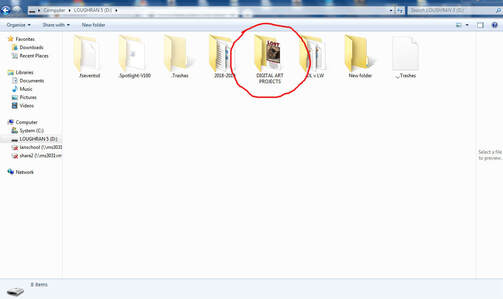 THEN, name your project files with your first initial, last initial and the project number. The example project file below bears my initials. You would use your own. ALL FILES SHOULD BE .png (for digital still images) or .mp4 (for digital animation projects). 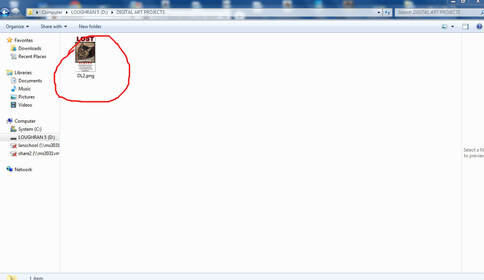 PUT ONLY YOUR FINISHED PROJECT WORK IN THE DIGITAL ART PROJECTS FILE FOLDER.
And then you are done and ready to submit your work for grading. ASSIGNMENT:
There are links to 8 tutorial videos below. The first 5 are for DIGITAL 1 students, the other three are for DIGITAL 2 students. IF THE LINKS DON'T WORK, COPY AND PASTE THE LINK ADDRESS INTO THE ADDRESS BAR ON YOUR BROWSER TO TAKE YOU TO THE VIDEOS. Do the following: 1. Choose the section of tutorials that contains those that are appropriate for your class. 2. Watch those tutorials by following the links. 3. For each tutorial video, write down five things you learned. Do so on lined or unlined paper, in pencil or pen. Remember, you can stop the video at any time to have enough time to write things. 4. Write in complete sentences and number each item you write down. 5. The grade for completing this will replace your lowest project grade for any project you have completed. TUTORIALS FOR DIGITAL 1 STUDENTS: Using Layer Masks in Pixlr (10:48) https://urldefense.proofpoint.com/v2/url?u=https-3A__youtu.be_hs2LtAp99n0&d=DwICAg&c=xqeeNFbi0oBFbe4IznK4e--5GG6Clqq80LVi1AqPhGE&r=xMGYbE_ZBbi9j1LzVO1ZKmskXqWcvtTnBxhftFNPIsU&m=pI7mC0oiU4ypdw228W-tKncZ74xWJoCB8vlar4VRUq0&s=hz9M67Bq-x1NYWNqe6J4Y_zZU6mpbNFwGuHbRtyCsoY&e= Using the Clone Stamp in Pixlr (7:31) https://urldefense.proofpoint.com/v2/url?u=https-3A__youtu.be_WQ6HQhZ-5FVtw&d=DwICAg&c=xqeeNFbi0oBFbe4IznK4e--5GG6Clqq80LVi1AqPhGE&r=xMGYbE_ZBbi9j1LzVO1ZKmskXqWcvtTnBxhftFNPIsU&m=6f09jvl06-YxLtFtOV8K9hLv3G7L0HI9kfvj3E_gewk&s=9hhMsfvVHBmozNz06ERtBgbCpDI9HNiLb5EbVxEUj2E&e= Using Filters in Pixlr (8:00) https://urldefense.proofpoint.com/v2/url?u=https-3A__youtu.be_rVQ9smR-5FkhE&d=DwICAg&c=xqeeNFbi0oBFbe4IznK4e--5GG6Clqq80LVi1AqPhGE&r=xMGYbE_ZBbi9j1LzVO1ZKmskXqWcvtTnBxhftFNPIsU&m=vbuKgWzDa5U5_wwB6f-Yo23LOJPMQGq8INssr144diI&s=H8Xoi2QcCgUeSldKnQOwq_tNdzYawr5dHV7NSJ79PTg&e= Using Layers in Pixlr (21:10) https://urldefense.proofpoint.com/v2/url?u=https-3A__youtu.be_vJbVSx0dAw0&d=DwICAg&c=xqeeNFbi0oBFbe4IznK4e--5GG6Clqq80LVi1AqPhGE&r=xMGYbE_ZBbi9j1LzVO1ZKmskXqWcvtTnBxhftFNPIsU&m=NY8Aquw1nojEzBXvn11uEjq5KcTjNFo6IXrKIURnrDY&s=Qofdlfen9jN5JWJ-OKny1u2UC2Vsar2ZrNRrZQooyVc&e= Using Selection Tools in Pixlr (10:14) https://urldefense.proofpoint.com/v2/url?u=https-3A__youtu.be_ozE26P2Gxj8&d=DwICAg&c=xqeeNFbi0oBFbe4IznK4e--5GG6Clqq80LVi1AqPhGE&r=xMGYbE_ZBbi9j1LzVO1ZKmskXqWcvtTnBxhftFNPIsU&m=ZUdtE16_G-lvX4s6bxMvt3VypyC647alZg7crw3DcRM&s=O_miYcpUJdqD6RcazeMKJ43oCx29Wi6cieHxReJJnak&e= Pixlr Tutorial (21:10) https://urldefense.proofpoint.com/v2/url?u=https-3A__youtu.be_T-2DKaEBD2PFk&d=DwICAg&c=xqeeNFbi0oBFbe4IznK4e--5GG6Clqq80LVi1AqPhGE&r=xMGYbE_ZBbi9j1LzVO1ZKmskXqWcvtTnBxhftFNPIsU&m=YBxNQvot9eJywQCz8ux-P4xjFColzkdeVeIfAfG80Yc&s=LS4mP7zG2AIGJpxBkwiKXee_LOyLvV_Ex8mRoVv3drs&e= TUTORIALS FOR DIGITAL 2 STUDENTS: Synfig Tutorial (15:59) https://urldefense.proofpoint.com/v2/url?u=https-3A__youtu.be_qWMyUr3326o&d=DwICAg&c=xqeeNFbi0oBFbe4IznK4e--5GG6Clqq80LVi1AqPhGE&r=xMGYbE_ZBbi9j1LzVO1ZKmskXqWcvtTnBxhftFNPIsU&m=-1dLWUsMvJlsWiYW2TV41aDeqgBRKh7FkuVmPN02KuQ&s=60OZ7N2JCG7WrzRHIqMTe-0ze1JZQw4_O13v1OsyBeI&e= Synfig Tutorial (9:00) https://urldefense.proofpoint.com/v2/url?u=https-3A__youtu.be_-2DnE-2DFzKPEbc&d=DwICAg&c=xqeeNFbi0oBFbe4IznK4e--5GG6Clqq80LVi1AqPhGE&r=xMGYbE_ZBbi9j1LzVO1ZKmskXqWcvtTnBxhftFNPIsU&m=hYqmFQvYf4s6xIHUk9v4PieyG8MDLGARnf1W3HLsCyw&s=niwSkFRyd7-HS1IiQtePTPLWHpwilbzCTL_BTE55LSE&e= Synfig Tutorial (14:32) https://urldefense.proofpoint.com/v2/url?u=https-3A__youtu.be_lcUCDUiHmX8&d=DwICAg&c=xqeeNFbi0oBFbe4IznK4e--5GG6Clqq80LVi1AqPhGE&r=xMGYbE_ZBbi9j1LzVO1ZKmskXqWcvtTnBxhftFNPIsU&m=TM9LLGCKcr0uz9gONDpebJFgkJZ5aeCrS27y5pPgl6Q&s=JGdbXSnCKnbdERA245wlowGO0Oqflm4tBOvextYuWa8&e= |
AuthorDaniel P. Loughran is an artist and art educator who lives in Jacksonville Beach, Florida. Archives
September 2020
Categories |
 RSS Feed
