|
This is actually a list of sketching assignments (yes, digital artists should have some knowledge of good old fashion drawing by hand). We will work on them throughout the first semester. We can start now by completing two of the sketches. Choose any two that you like.
DIGITAL ART Semester Sketches Drawing Assignments for Digital Artists NOTE: If the sketches you draw by hand are not correctly labeled they will not be graded. Please follow these instructions for labeling your sketches properly: 1. In the bottom right-hand corner on the front side of the drawing paper, write the title of the sketch assignment exactly how it appears on this list. 2. On the backside of the drawing paper, write your first and last name and class period (1, 5, etc.) The following sketches may be done in any order. There are 16 sketch assignments all together. Eight of them will be drawn by hand while the other eight will be put together on the computer. YOU will get to choose which assignments to actually draw on paper and which ones you will do digitally. By the end of the first semester we will complete all of the sketches on this list. "Illustrated Song" Consider the music and lyrics to a song that you find interesting. Draw a short "comic strip" illustrating the story in the song. The more creative the better. "Five Hands" Using only one page, draw your own hand (the one your not drawing with) in five different positions. They may have to overlap or fit around each other in order to get all five on the same page, which is fine. Just make sure you draw them while looking at the real hand, draw them approximately life-size, and absolutely do not trace... I can tell! "Emotion" Choose an emotion such as "anger", "joy", "hate", "love", etc. Create an imaginative drawing that expresses or illustrates that emotion. It can be very realistic or not realistic at all. Be creative! "Picture Diary No. 1" In the same way that people use writing in a diary to record personal events, use pictures or a combination of pictures and words to record an event from your life in your sketchbook. Make sure to date it somewhere. "Illustrated Book" Choose a scene from a favorite book and draw a picture of it. "Company Logo" A good logo is attractive, attention catching, creative, and in some way communicates an idea about the business it represents. Create an imaginary company. Decide what the company does, what it produces, what service it renders, etc. Design a logo for the company that in some way contains the name of the company. Unlike most of the other assignments, this one does not necessarily need to use up the entire page. "Picture Diary No. 2" In the same way that people use writing in a diary to record personal events, use pictures or a combination of pictures and words to record an event from your life in your sketchbook. Make sure to date it somewhere. "Illustrated Dream" Draw a picture that illustrates a particularly powerful dream you've had. If you can remember none of your dreams, illustrate a daydream. "Still Life" A still life is a collection of non-living, non-moving objects such as fruit, flowers, drinking glasses, etc. Select three of your own objects and arrange them in a small still life. You may even use your phones but make sure they remain OFF. Other objects could include keys, school supplies or just about anything else you have with you. Draw the still life using shading or color to represent light and shadow. "Animal Self-Portrait" Choose an animal that you feel in some way represents you or something about your personality. Using the majority of your drawing paper, draw a portrait of yourself that combines your own facial features with those of the animal you select. Be imaginative! The drawing doesn’t have to look like you, it just has to be some sort of combination you and your chosen animal. At the bottom of the page, write a short explanation of why you chose that particular animal and how that animal represents or symbolizes something about you and/or your personality. "Picture Diary No. 3" In the same way that people use writing in a diary to record personal events, use pictures or a combination of pictures and words to record an event from your life in your sketchbook. Make sure to date it somewhere. "Picture Diary No. 4" In the same way that people use writing in a diary to record personal events, use pictures or a combination of pictures and words to record an event from your life in your sketchbook. Make sure to date it somewhere. "Album Cover" Choose an album or CD from a real life band that you enjoy or find interesting. Redesign the cover or insert. "Multiple Perspective" Choose an object from real life. Draw it from five different perspectives or points of view. Arrange all five drawings on the same page. "Picture Diary No. 5" In the same way that people use writing in a diary to record personal events, use pictures or a combination of pictures and words to record an event from your life in your sketchbook. Make sure to date it somewhere. "Landscape" Choose a place outside that you find interesting, beautiful, etc. Using your entire page, draw a picture of that place. How will the sketches be graded? You have been assigned 16 sketches, each worth a possible maximum of 5 points each. The sketches will be graded as follows: 5 points: The sketch shows a solid 30 to 45 minutes of work on the part of the student. It is clear that the student worked carefully and thoughtfully. The sketch uses the majority of the page. The sketch is well developed, possibly including color and/or shading even when it was not required in the sketch description. 4 points: The sketch is well done. It shows effort on the part of the student. It clearly meets the requirements of the assignment and shows that the student took their time and made a solid effort to do good work. 3 points: The sketch shows a fair amount of work. It is a careful drawing but possibly not complete or fully realized. The student seems to have accomplished the goal of the assignment, but it is not clear that the student fully understood what they were doing or gained much meaningful practice doing it. 2 points: The sketch appears hurried or rushed. It is not very well developed but at least shows that the student took the time to sit down to make some sort of effort, even if the results are not fully realized. The point of the work is unclear and the drawing incomplete despite a possibly good start. 1 point: The sketch shows very little effort. The student obviously rushed through the assignment with little regard for doing any meaningful work. The work is incomplete and the point of the work is completely unclear. "Try without fail to draw something every single day." - Domenico Ghirlandaio 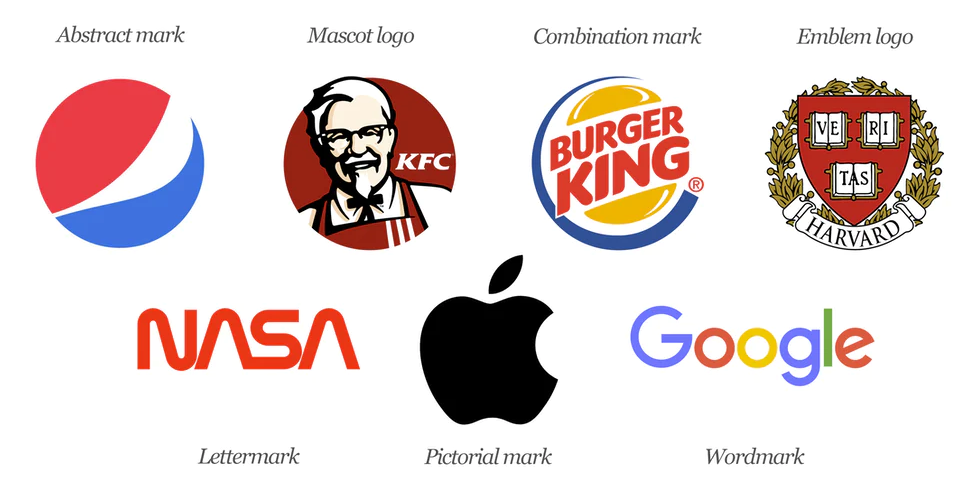 Types of Logos
Lettermark A logo that uses a company’s initials with a specific font when the company’s name is longer than one word (IBM, AT&T, NASA, etc.) Wordmark A logo like a Lettermark but when a single whole word is used (Google, Nike, Amazon, etc.) Pictorial Mark A logo that uses a recognizable object as a company’s symbol (Apple, Polo, etc.) Abstract Mark A logo that is made using an abstract (not realistic) geometric shape (Pepsi, Adidas, Nike, etc.) Mascot A logo that uses a person or animal as a company’s “representative” (KFC, Captain Crunch, Mickey Mouse, etc. Emblem A logo that combines an Abstract Mark (shape) with a Lettermark or Wordmark (letters or words) Combination Mark A logo that combines a Pictorial Mark (picture of something) with a Lettermark or Wordmark (letters or words) ASSIGNMENT Using the computer program/software of your choice, or drawn by hand with pen or pencil, create one of each of the seven logo types listed above for an imaginary company named after you. You can use your first, middle or last name or any combination of them. And, of course, use your initials when necessary. No rules on the color(s) you use right now. And if you are drawing this by hand, you may have to use just the color of your pen or pencil. We will use these designs in a future assignment.  Download/Save this file by right-clicking (mouse) or two-finger-clicking (laptop track pad) and selecting "SAVE AS" or "SAVE IMAGE AS" depending on the OS you are using.
DIRECTIONS:
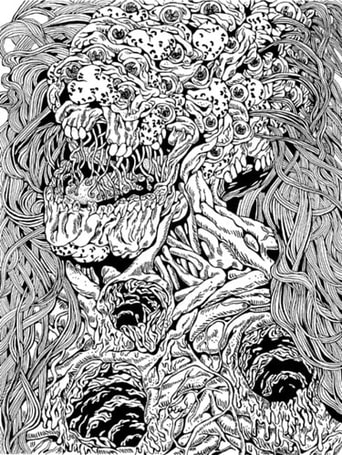
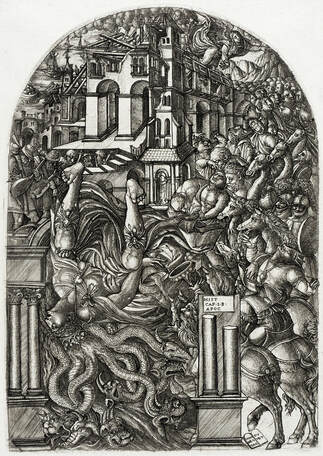
On a sheet of unlined 8 ½ x 11 paper (you can use lined paper if you don’t have unlined paper available), using pencil or pen, draw a full-body self-portrait (picture of you) doing the most fun, adventurous or exciting thing that you did over the summer break. Your drawing must meet the following criteria: 1 It should only be outlines of you and any other objects. No coloring or shading… very important. 2 It should use up the entire page. 3 All of the shapes you draw should be “closed shapes”. For example, if you draw a circle, make sure that the beginning and the end of the line you draw touch each other once your circle is done. This part is also very important. 4 Your self-portrait should show you and at least five other objects or things as well as the background (where you were as you were doing what you were doing). I know, it’s very hard to draw people. Just do your best. Your drawing doesn’t have to be super realistic. It can be cartoonish. Hold onto this drawing when you are done. We will be using it as part of another project soon. Have fun with it. Remember, your best effort will be plenty good enough even if you are not an experienced artist. This assignment has three parts. If you're reading this, you've already done the first part. 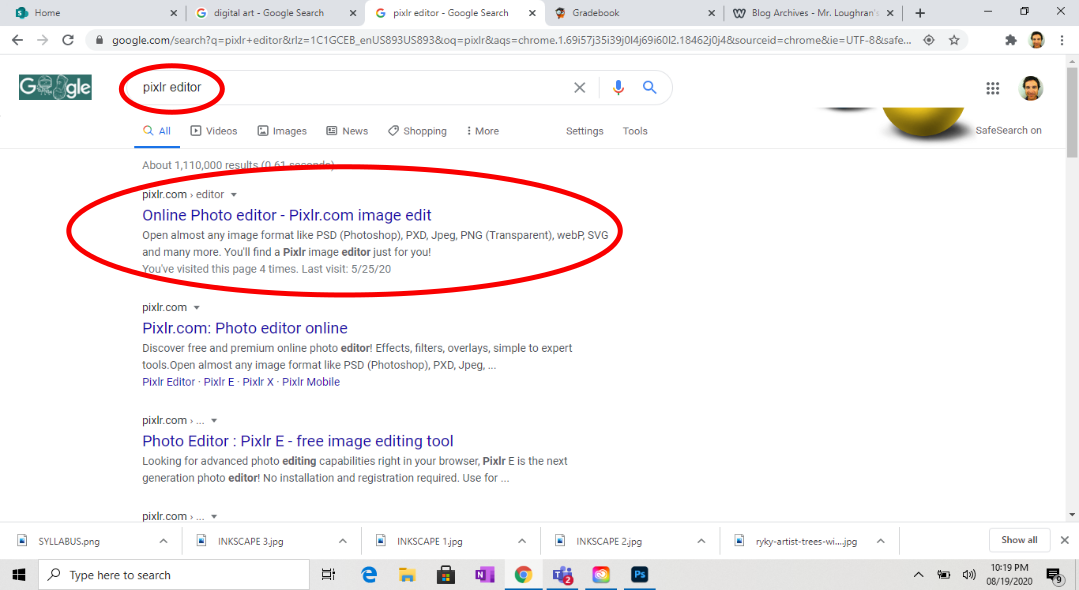 2. This is what you are looking for. 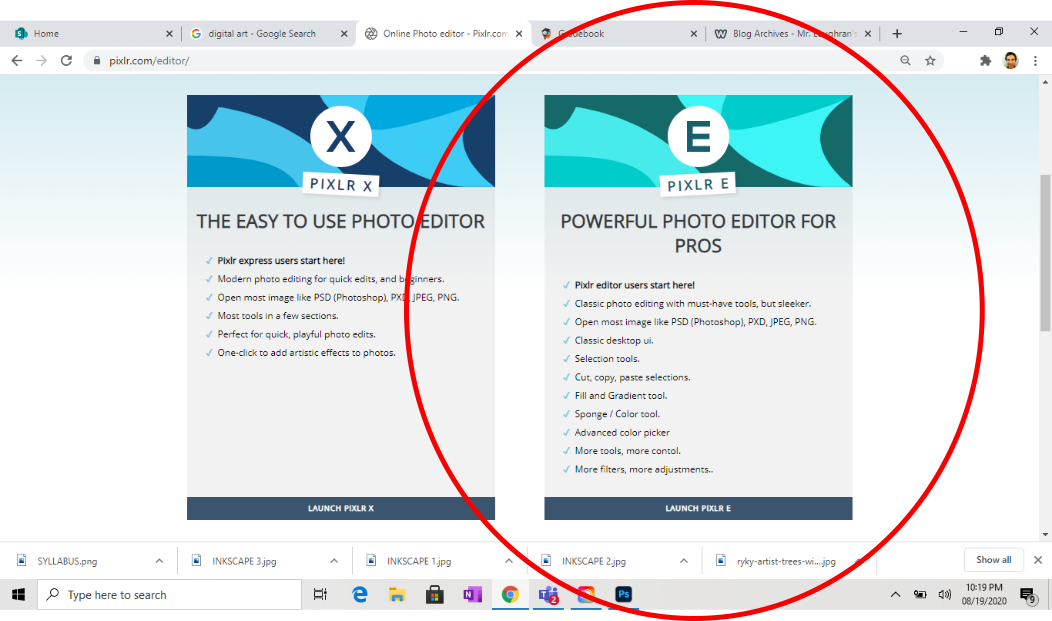 3. And if you are already PIXLR user but prefer the older version, scroll down toward the bottom and click "LOOKING FOR OLDER PIXLR EDITORS?" 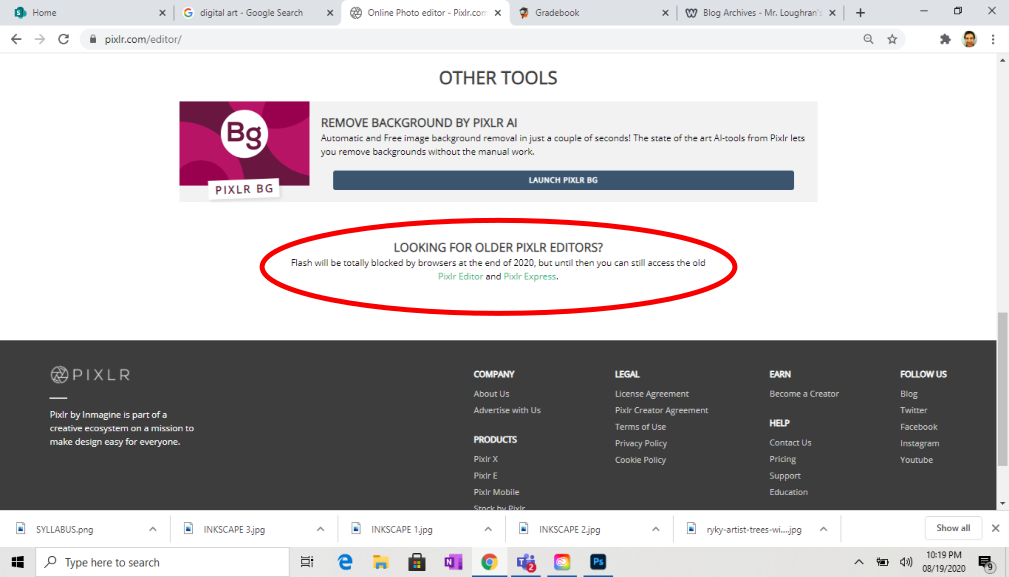 PART 3 is to find your way to INKSCAPE. Specifically, you're looking for INKSCAPE PORTABLE. A Portable App is also Open Source but you don't have to be online to use it. It's a small "temporary" program that works on your computer but it's not something you have to actually download. INKSCAPE is the the main drawing/layout program we will use. To find it, follow these directions: Here are the steps to follow: 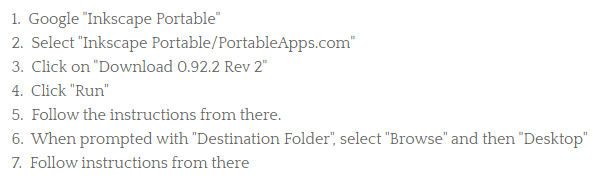 So, begin by searching "INKSCAPE PORTABLE" 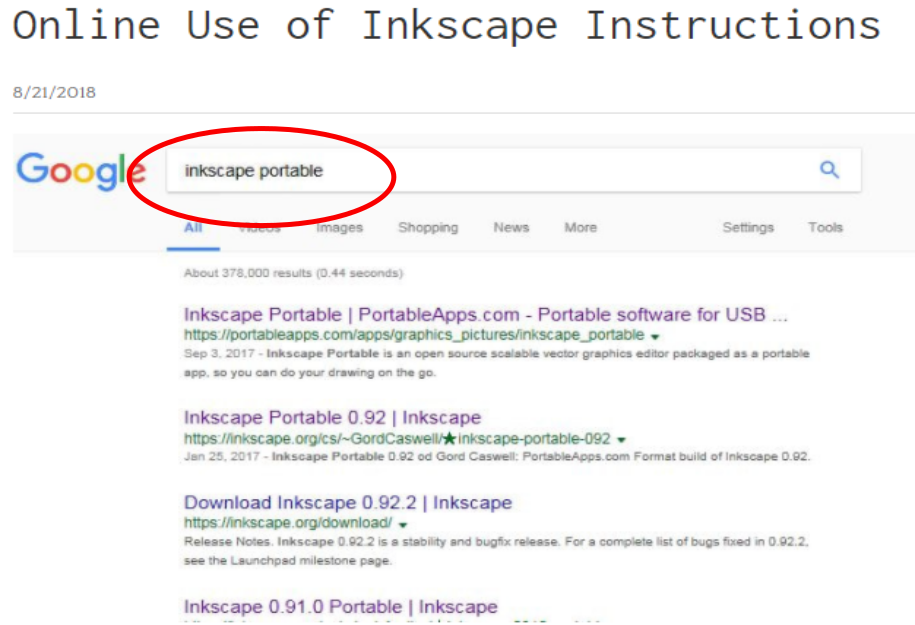 THEN... 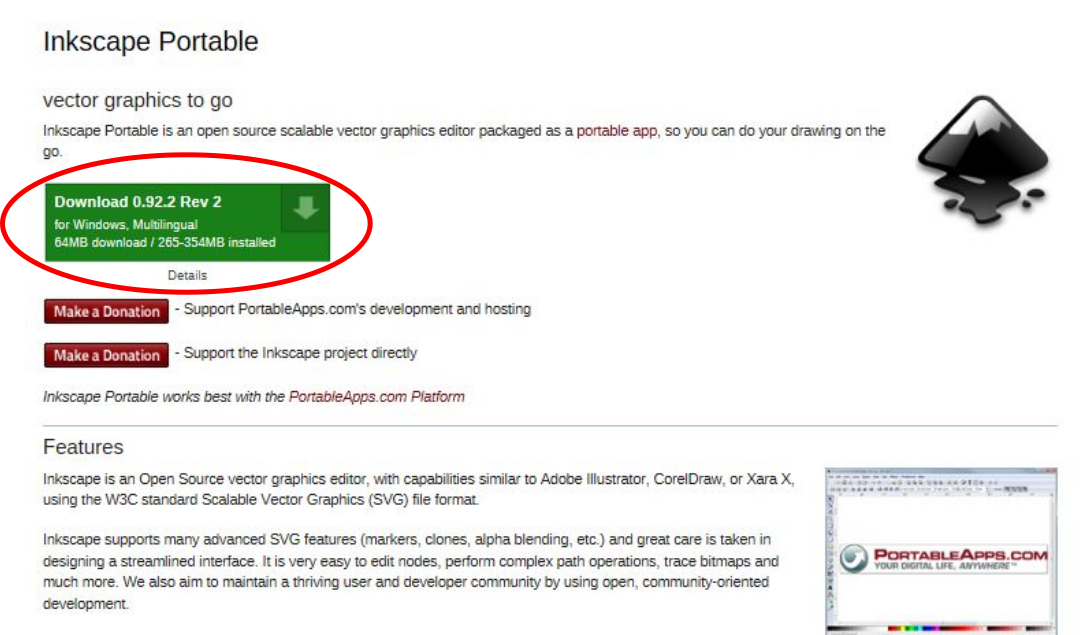 THEN... 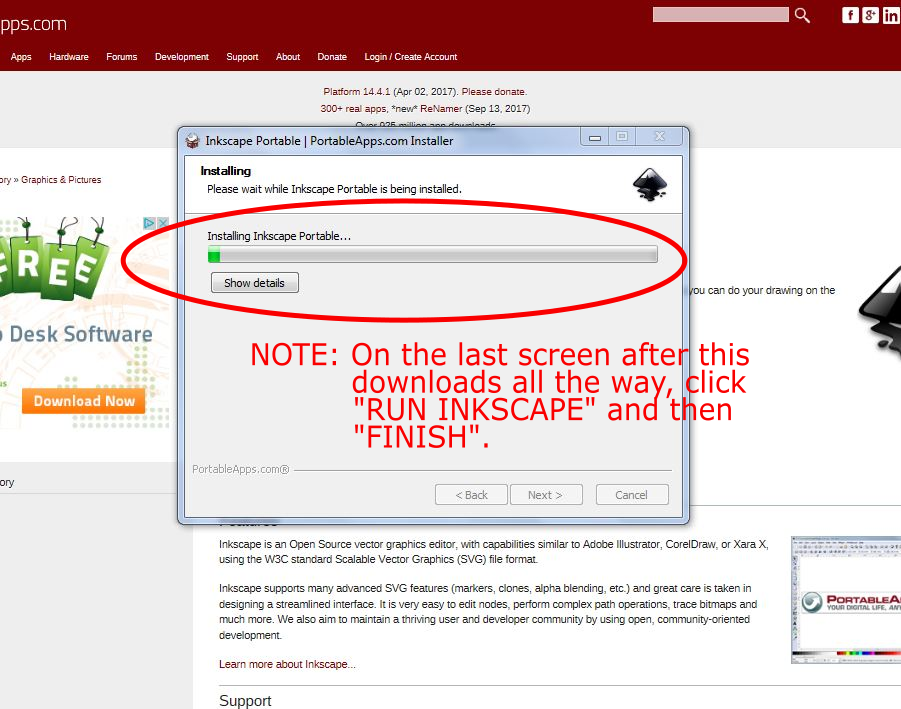  This is Baldo and his brothers Waldo, Renaldo, Geraldo and Jeff. The five brothers LOVE to play Hide and Go Seek. Can you find all of them in the picture below? 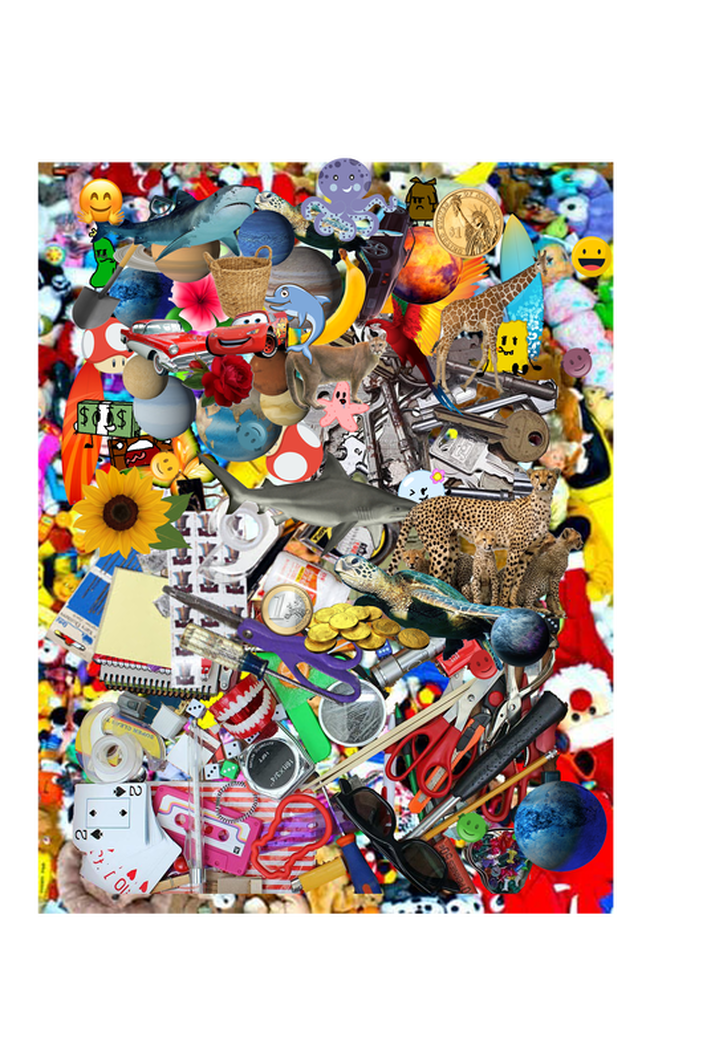 YOUR ASSIGNMENT is to create an image in which, like my example above, you hide one or more objects. Your object(s) can be person(s), place(s) or thing(s). But, before we go any further, there are a few terms you need to know. Horror Vacui (“Har-or Vac-you-eye): (Noun) A fear or dislike of leaving empty spaces, especially in an artistic composition. Negative Space: (Noun) In a drawing, painting or other artistic composition, the area that contains no objects. It could also be called blank, empty or unused space. Negative Space is often filled only with a single color. Composition: (Noun) The arrangement of objects, shapes and colors in an artistic work such as a drawing or painting. (Verb) The act of creating artwork. That's it really. Just those three terms. But you need to know them. When you do, you should easily be able to understand the following sentence: "Horror Vacui is a style of art in which there is little or no Negative Space in the Composition." The images below are good examples of Horror Vacui drawings.
Back to your project...
Your Horror Vacui composition will be graded on the following criteria: 1 The image measures approximately 2000 px X 2500 px. My example above is 1850 x 2400 and if yours ends up anywhere near that, it's fine. You can make it in the Portrait or Landscape format. 2 There is almost no Negative Space in the Composition. You will need to do some overlapping of your objects to get them close enough to each other so that there are almost no empty spaces. 3 You use no fewer than 100 images in your Composition. Really, it's not that many. My example has over 300 in it. But do take enough time to do this well. You have TWO WEEKS to complete this. Use images with no background so that you don't have to trim everything out. If you want a picture of a dog, search something like "dog with no background" or just add the phrase "transparent png" to any words you search for. 4 Each of your images is just the object itself, no background of any kind. 5 You submit this project for grading NO LATER THAN FRIDAY, MAY 22, 2020. I will not have time to grade your work otherwise. THIS PROJECT WILL BE YOUR LAST ONE. IT IS WORTH 200 POINTS, TWICE WHAT YOUR OTHER PROJECTS THIS QUARTER ARE WORTH. So do your best work :) Other than that, I hope everyone is well and being safe. Take care of yourselves. Loughran 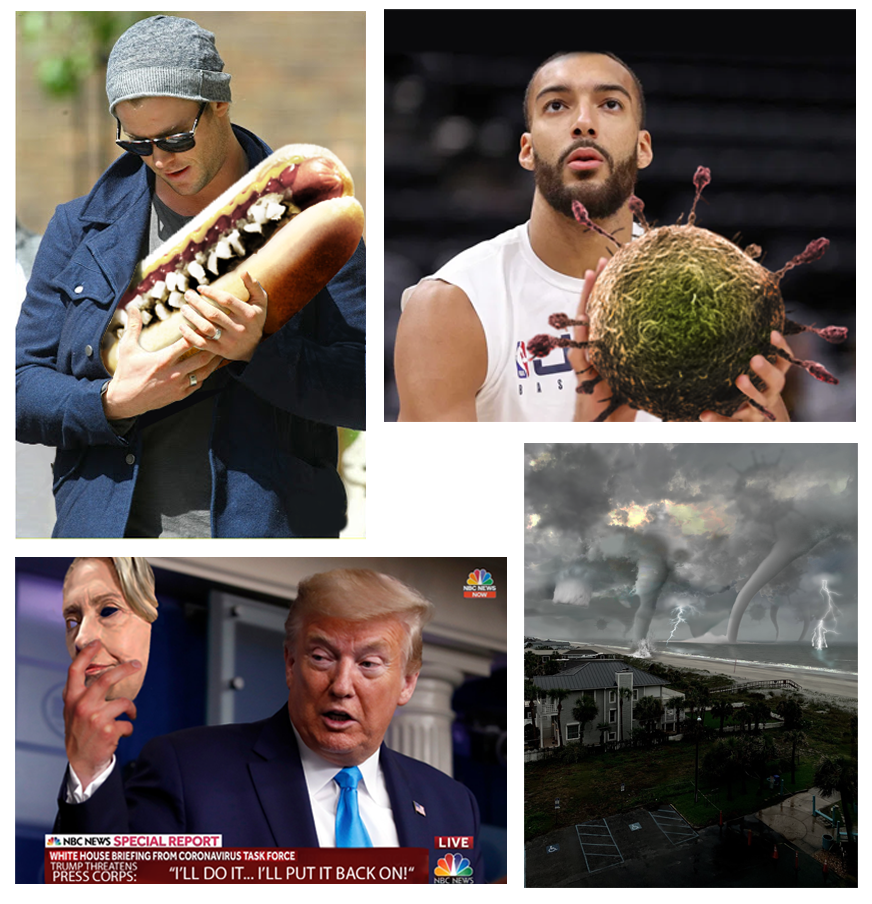 Photojournalism (Definition) The art or practice of communicating news by photographs, especially in magazines. My examples above are based on the following real news headlines: 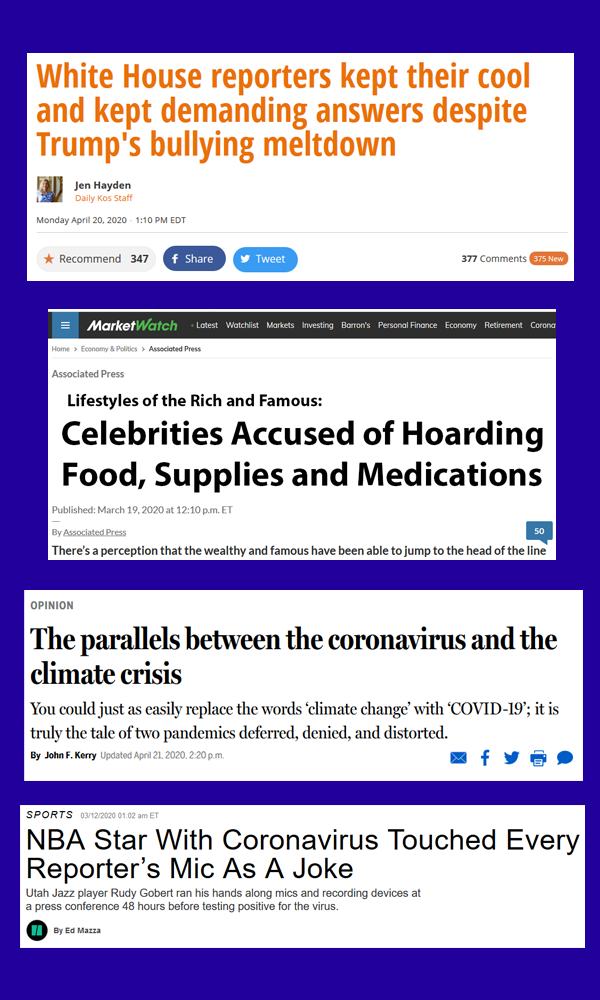 If I've done my job well, the images tell a story and are interesting and attention-getting at the same time, With a little luck you could match the headlines to the images with no problem. It should be stated now that proper photojournalism does NOT include fictional Photoshop images... but it will for us for this assignment :) ------------------------------------------------------------------------------------------------- ASSIGNMENT: 1. Choose four (4) different news stories that in some way have something to do with the Coronavirus, one for each of the following catagories: - Celebrities - Professional Sports/Entertainment - Politics - Science 2. Screen shoot the headlines as I have done above. Using the Snipping Tool if you are working on a Windows computer is a really good way to do it. Press the Shift, Command and 3 keys all at once for Macs. 3. Create four (4) images, one for each of the four headlines, by combining and editing images in Pixlr, Photoshop or another raster image editing program. Your project work will be graded based on the following: - Quality of Photo Editing - Your Images "Tell the Story" of Your Headlines in an Understandable Way - Your Images are Interesting and Attention-Getting (Funny, Scary, Unusual, etc.) When you are done, arrange your four new images and your four headlines in one big image measuring (approximately) 1000 pixels x 1500 pixels. If you make it too small the whole thing will be blurry or pixelated and hard to see. If you make it too big the finished file will be too big and it will be hard to send to me. My example below measures 1000 pixels x 1600 pixels. You do not have to put your final project together to look like my example (pics on the left, headlines on the right, blue background, etc). Put all the stuff together in any way you see fit. 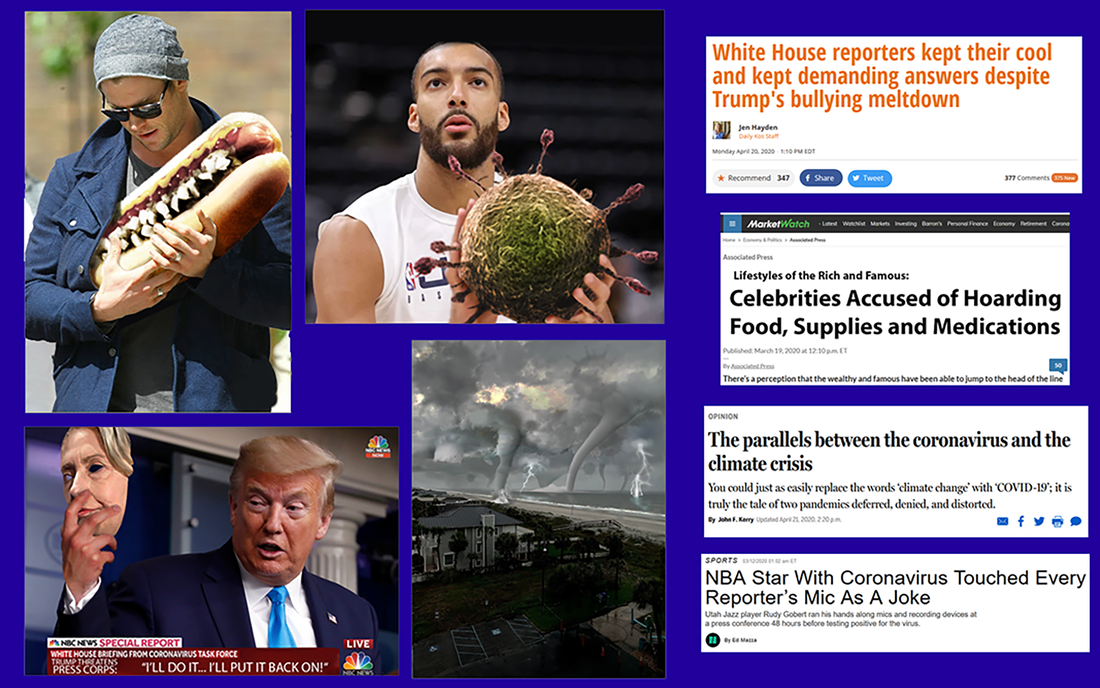 |
AuthorDaniel P. Loughran is an artist and art educator who lives in Jacksonville Beach, Florida. Archives
September 2020
Categories |
 RSS Feed
